Sunday, September 20, 2015

September 20 update.

More pics:
I suppose it was unrealistic to think we could move ceilings and walls around downstairs as much as we did and not expect that we'd be moving things around upstairs too. Here we see some of the results.

No cracks here but this is the door to our baggage room which is absolutely jammed shut. We can't get it open.

This appeared in the master bedroom. There were also so cracks in the hallway outside the bedroom door. The first day we started jacking things up downstairs out bedroom door would shut all the way any more. A couple days later they jacked up another section downstairs and suddenly the door would open again.

Here is where we straightened out a wall. If you look at the old tiles on the floor you can see the angle of the old wall. We had to straighten the wall to create room for the range (6 ft wide). We also just found out that the ventilation system for the new range is pretty substantial. It moves so much air that we would actually cool off the house in the winter so we have to heat the air that comes into the ventilation system. More on that later.


Here is the new doorway going into the new bathroom.


This is the new vanity and bronze sink that will eventually go into the new bathroom. For now it's still sitting in the garage.

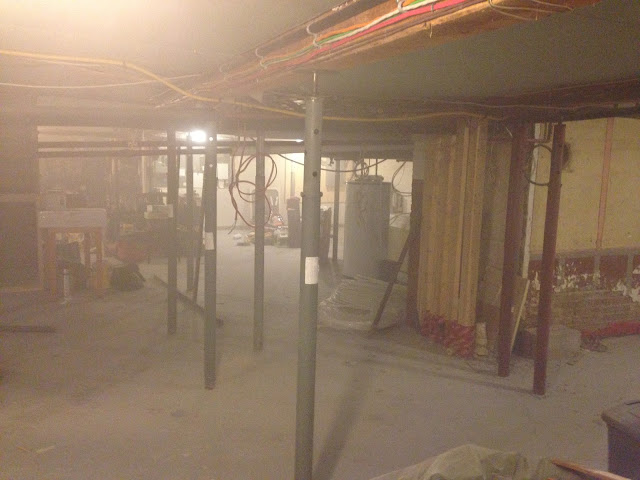
With all the changes upstairs we sometimes neglect to report what's going on in the basement. Here is some of the old heating pipes that have been stripped out to allow for the new water lines that will be installed in the next few weeks.

Here are "the sisters". They're the two new furnaces that will heat the house. Most of the time one furnace or the other will be running (one week on, one week off). But in the coldest months both furnaces will run together to heat the over 6000 square feet of heated space (counting the heated barn) that we now have. We'll have more pics as the furnaces get made more at home.

September 15 - Another update

More photos that I'll let explain our progress so far:
At the top of the picture you can see the i-beam. It has wooden planks fitted and bolted into the sides so that the roof rafters can be attached. The beam weighs over 800 lbs and had to slowly be jacked into place using the "cribs" you see supporting each end of the beam. They would jack the beam up about 8 inches, insert another layer of the crib and then repeat until the beam was in place.

Another angle of the crib under the beam.


Here's a look at the opening for the fireplace.

The wall studs in place for the new bathroom wall and the opening for the French doors leading to the deck.

The i-beam all in place and the cribs removed.

September 10, 2015

We've gotten to the point that long explanations of what's happened during the one or two preceding weeks are all starting to sound the same. Suffice it to say that we've rounded the corner and are no longer tearing down parts of the house but are, indeed, rebuilding. I'll let the photos speak for themselves:
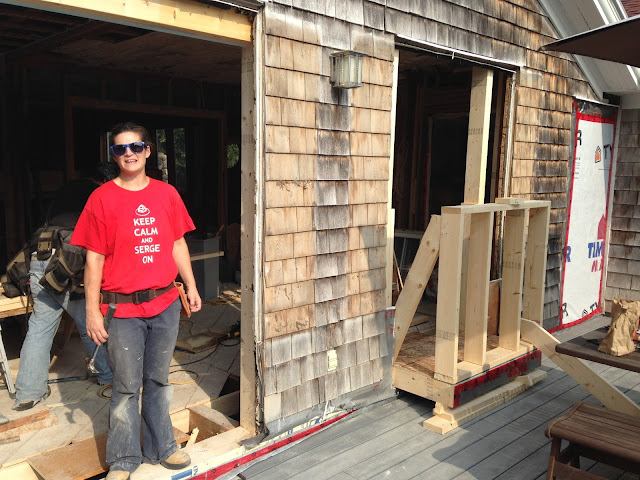
Meegan standing where our French doors will be installed.

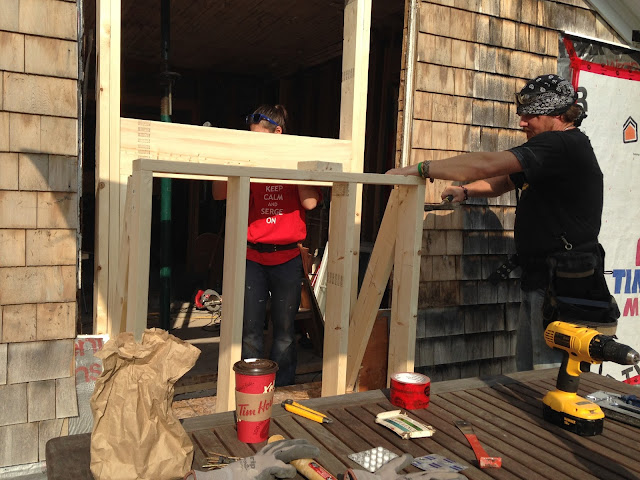
Meegan and Dan constructing the frame of the structure that will hold the fireplace.

Another view of the fireplace structure.

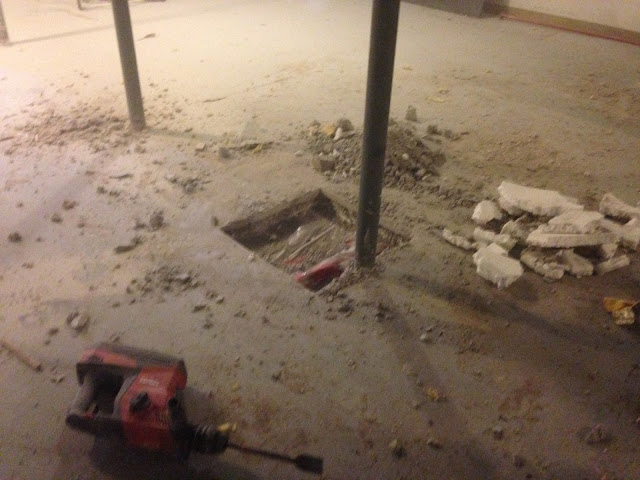
The large i-beam that has to be installed in the kitchen needed support that went straight through to the basement. Even though basement floor was already about 4 inches thick, it wasn't going to be enough for the load that is on that beam. Here Matt cut a piece out of the floor and then dug down further and then refilled that with more concrete.

The saw used to cut through the cement was gas powered and left a nasty haze of smog in the basement. We had to leave the door open all day to air it out.


Friday, September 4, 2015

Another week behind us and the demolition continues (with at least a little bit of rebuilding this week)

So even though there was more demolition this week there was also some progress made in the other direction. Windows were ripped out but door frames were put in. The giant steel beam was prepped to be installed next week. We had a little hiccup with the fireplace - mostly due to us not being sure of the dimensions when we did the design for the renovations - but we rejigged a couple things and everything now will fit perfectly. Take a look at some of pictures taken this week:

With almost all the studs taken down you can start to get a sense of the dimensions of the new bathroom and how the room will look with a hall going toward that spare bedroom door. That door will be at the end of the hallway and will be where we put the "secret" doorway leading to the spare room. The door will actually look like a bookshelf (don't tell anyone).

It's been a long time since this window was open. Harry opened it so he could paint the trim outside and Meegan fixed up some of the wooden trim that was bad.

Matt removes the window where the fireplace is going to go. We had to do a little redesigning around this. The fireplace we ordered stands out away from the wall further than we allowed for in the design. This made it jut out into the entrance to the room too far. So, we're going to let it jut out onto the deck  instead and surround it with a nice casement that will match the rest of the house. This will give us lots of room inside and will still work well with everything outside.

The new door frame for the French door is in.

From the inside it doesn't look like there's much wall left. But it will look a lot different once the fireplace and mantel are in place.

The beam getting prepped for placement next week.

Dan spent a lot of time this afternoon drilling holes through  the steel beam. He assures me that was not an easy task.

Wednesday, September 2, 2015

September 2, 2015 - Summer is slipping away...and so is our old kitchen.

So now we're into September and the race is on between chilly fall weather...and a weather-tight house. Part of the renovation is a whole new heating system. We're actually installing two new furnaces that will work in tandem - one runs for a week and then the other. During the coldest days of the winter they will both run together. A computer dictates which one runs when and when the temperature is cold enough to require both to be running. This is a more economical way to heat the house since two small boilers use less energy (running alternately) than one large one running all the time. We also discovered that the wall next to the deck was basically being supported by two 2x4s - and nothing else (due to a lot of rot on that wall). That's not a lot of support for a whole wall that's also supporting the room above it. We supported the ceiling with jack posts and cut the two 2x4s. I have a video showing how flimsy the wall was. A very large steel beam arrived today that will create all the support we'll ever need for the upstairs and the roof. Check out some of the most recent photos below:

Although not actually part of the renovation, the front of the house got a face lift as well. All the white trim was painted, we decided to ditch the shutters and go for a more traditional New England look and I finally talked Mike into letting me cut down the two giant Cedars that used to flank the front stoop. I think John Dickie - from The Briar Patch Nursery - summed it up best when he said that those trees had simply outgrown their location. The Cedar shingles that were under the shutters are a different colour than their more weathered counterparts but that will quickly change. In a year or so they will be a perfect match.

The demolition of the old bathroom started with the removal of the - never used except to wash the dogs - bath tub. Besides finding the remnants of a mouse habitat (along with the remnants of one mouse) we also uncovered the old base of the original tub that predated the one we removed. We know that the old original tub was poured porcelain (like the base of the shower) but was destroyed when it was removed decades ago. We had also been told that there had been a foot bath near the shower but we couldn't find any trace of that.

The wall's coming down. Only the mortar backing for the old tiles and the original medicine cabinet remain. It took days to chip away all the old tiles (two layers) and then the mortar and wire mesh that they were cemented onto.

This is the first load of old heating pipes and insulation that was removed from the basement. We're running all new heating lines with more efficient materials.

The vanity is gone and we've exposed the old white tiles that were in the original bathroom. On the right you can see the mortar and mesh that held them in place for almost a century. If you look closely you can also see that the tiles on the floor are identical to the tiles that were in the kitchen. Both rooms - this bathroom and the old original kitchen - had about 5 inches of cement under the tile floors.


Here you can see where the sill (which had rotted out) was replaced with these timbers and insulation strapped together. The floor joists of the deck will eventually be bolted directly to this beam. This is also where the new French door will be installed that will lead out to the deck.

This is the beam that was delivered today. It will go across the ceiling and create the basis of the support system for the other half of the kitchen, the upstairs and the roof. Given the size of the house, a beam of this size was required. Installing this may also help to level out some of the floors upstairs. They will never be perfectly level again but we knew we would never have straight floors in a 100-year-old house and were fine with that. It adds to the character of the house.


Wednesday, August 26, 2015

Good-bye Yellow Brick Wall

When we first announced the renovation of the kitchen many of our friends were horrified to think that we were going to get rid of the brick features in the kitchen. Although we understand their appreciation of the brick - we didn't share it. This week saw the end of the yellow brick wall. So, sorry to our friends who liked that feature of the kitchen. You'll have to take our word for it that what we have planned for that space in the kitchen will be brighter and better than the formerly glorious yellow brick wall. Here are some photos of what was accomplished this week.

Much of the yellow brick wall is gone at this point. Matt is preparing to take down the arch.

Here is an action shot of Matt delivering the final blow that sent the familiar arch to the floor.

This is all that's left of the wall where the cupboards used to be. As soon as we have the new steel support beam in place, these wall studs will come down as well.

Here is the chimney and old laundry shoot that were both behind the bricks. Although the laundry shoot hasn't been used as one for years, we'll keep it in place behind the new wall as all of our electrical and plumbing for upstairs runs up through it. When the new stove is in place, we may also need to run the range hood ventilation up through this same opening.

Looking through the demolished walls you can see the side of marble shower through the bathroom door.

This is the wall where the old sink and counter were located. The windows will be replaced with new ones and another one will be added to really brighten up the kitchen.

Here are all the bricks salvaged from the kitchen. Our plan is to work with Aaron (our garden guy) and maybe come up with a pathway or some sort of installation that he can create with the salvaged bricks.

I decided all the demolition pictures were getting too depressing so I thought I'd add some pictures of parts of the project that are already done (or close to done). Here is an interior shot of the laundry room. This is the picture window with the brand new trim all in place and painted. Over it is a new pendant light that is a match to the pendant light that will be over the sink in the kitchen. Although you can't see the kitchen window from this window, anyone parking on the parking pad in the evening will be able to see the matching lights through the windows.

Here is the door to the TV room with the newly installed trim all painted. The outside trim is white to match everything in the hallway. The inside of the door shows the extra depth of the double think walls. The sliding barn door will go on the outside of the door frame with the track being bolted to the extra long piece of trim you see at the top.  We painted the inside door trim the same colour as the interior of the room. This way, when we're watching TV, with the door closed, we won't be looking at glaring white door trim inside the darkened room. The plastic barrier with the zipper is our entrance to the rest of the house.

Here are the rollers and track after I cleaned them up.  We salvaged them from the original carriage house doors so we thought it would make sense that they stay in the carriage house in whatever form it may be in. Matt is going to construct a door that will attach to these rollers which still work as well as they did when they were new - 100 years ago.

Sunday, August 23, 2015

August 21 - The Carnage Continues

It's been 5 days since we began the destruction of the old kitchen. As an added twist, one of Matt's guys called in sick on Friday so I became the replacement demolition guy. I'm no contractor but I do know my way around a crowbar. I think I did a pretty good job if I do say so myself. Take a look at some of the shots taken this week:

This is the angled wall which used to hold cupboards and a counter. In the reno the angle will be removed and this will be the straight wall that the new Lacanche range will be against.

This was the doorway on the angled way. It, and the corner piece of wall beside it, are being removed. We will likely have to install extra support beams  in the ceiling to make up for the loss of the support in this wall.

This old door will be removed and a doorway will take it's place.

First thing Friday morning Matt and I took the first load of demolition refuse to the dump. Over 5,000 lbs of debris on this load.

Most people who walk into this room now look around and comment that they're not sure what part of the old kitchen they're looking at. As walls and doors and windows are being removed we're starting to get a sense of how drastic this remodel is going to be.

When I became the person removing the old lathes I got a real appreciation of how many of them are in this house. When I consider that we're only removing the ones from the kitchen I get a real sense of how many were used in the original construction of this whole house.

Ready for work. It was hot and dirty work for sure but I've discovered  there is a certain therapeutic value associated with demolition.  I may continue  with my new found vocation if the boss thinks I did a good job last week.